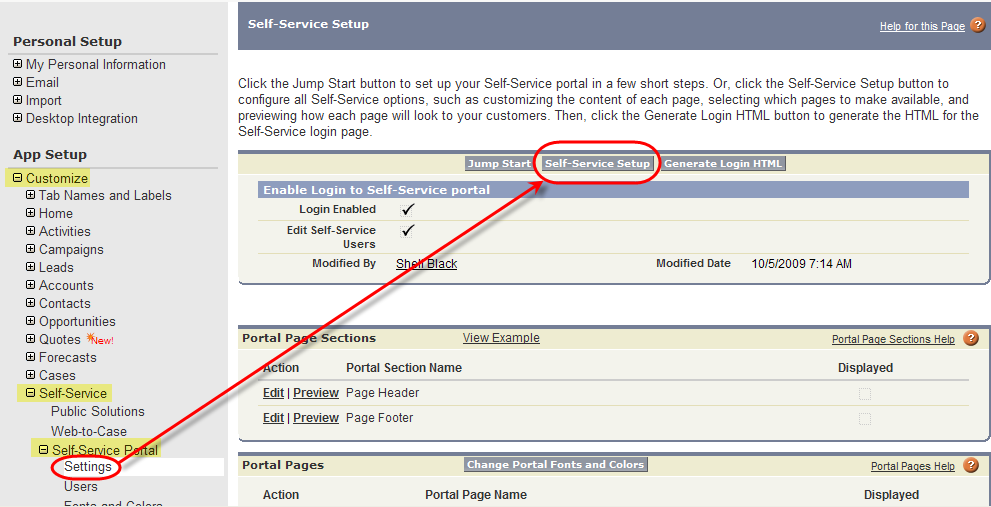
So let’s get started. Go to Setup > App Setup > Customize > Self-Service > Self-Service Portal > Settings
On the page that displays, you will see three buttons at the top. Let’s start with “Self-Service Setup.”
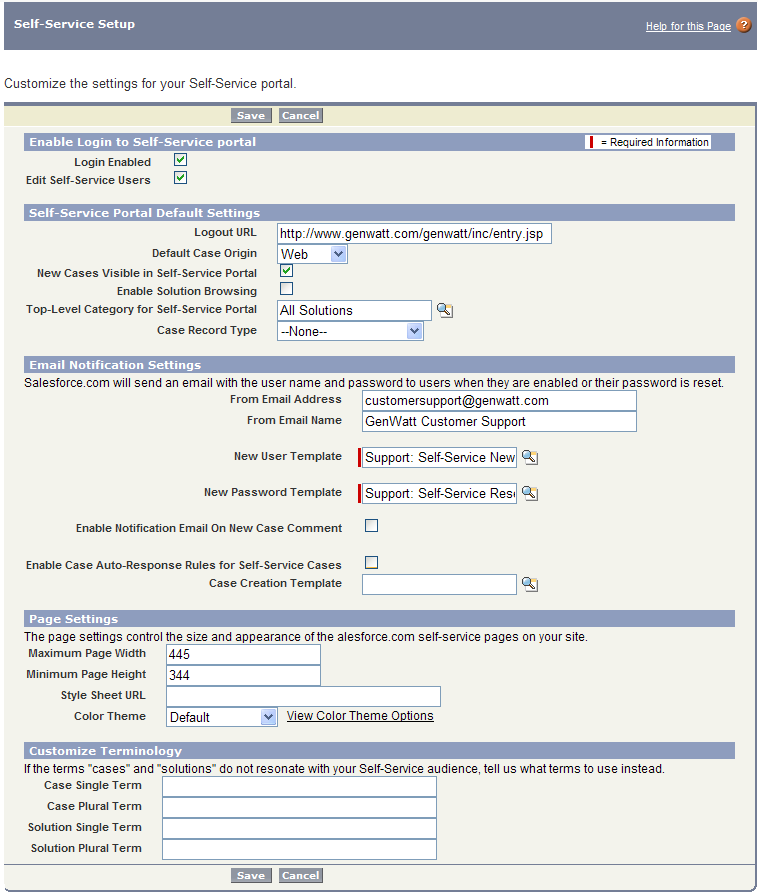
As you can see there are a lot of options to configure. Let’s start at the top.
In the section labeled “Enabled Login to Self-Service Portal” you’ll see two checkboxes. The first simply allows Users to login to the Portal. It’s a quick way to turn off access to the portal to everyone with one-click. The second adds a button at the top of the Contact record called “Enable Self Service.” We will cover that in the section below when we activate Portal Users.
The next section is called “Self Service Portal Default Settings”
The Logout URL is simply where do you want the User to go on your website when they click the logout button inside the Self-Service Portal. For example, you could take them back to the login page to the portal or to the Home Page of your company website.
Default Case Origin is the native field on Cases called “Case Origin.” It defaults to “Web,” but if you want something else like “SSP” you’ll need to first add the new pick list value to your “Case Origin” field before you can select it from this page.
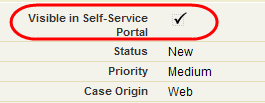
New Cases Visible in Self-Service Portal – If checked, all Cases created on the Portal will be visible on the Portal. This is actually a field you can drag onto your Case page layout. When you do so, Cases taken by phone for example can be pushed to the Self-Service Portal for your customers to see by having this box checked.
Enable Solution Browsing – This checkbox adds the Solution Category tree to the Solutions tab of the SSP. This allows a Portal Users to click into categories to find what they are looking for rather than search by keyword (e.g. Printers > Lasers > Paper Jams). Of course the next step will be required if this is checked.
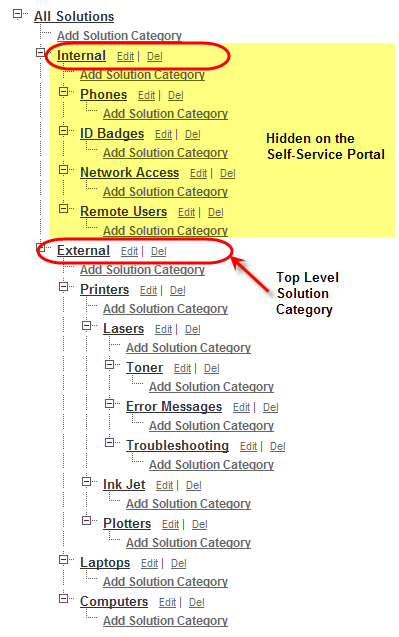
Top Level Category for Self-Service Portal – If you have not built out your knowledge base of Solutions, you’ll have to come back to this step. What this allows you to do is to carve out a subset of your solutions to be displayed on the SSP. For example, you may have some solutions that are for internal Users and some Solutions that are designed to be externally facing to your customers. Solutions Categories leverages a hierarchy, similar to your Role Hierarchy. In the example below, by selecting “External” as my top level category, I’ve locked out my SSP Users from seeing solutions nested under the category called “Internal.”
Case Record Type – As I mentioned earlier, you can have record types and unique page layouts on a SSP. Record Types control the pick lists values available for pick list fields. If you don’t want all the values of your Case pick lists available to your Portal Users, create a custom Case Record Type and select it here.
Now let’s move on to the section called “Email Communication Settings”:
From Email Address & From Email Name – When you activate a new Portal User, or a Portal User requests a password reset (covered later), this is the email address and name that will be used on those communications when they are sent by Salesforce.com.
New User Template & New Password Template – There are some generic emails already created for you, but they can be customized as needed with additional messaging and branding (not covered in this discussion).
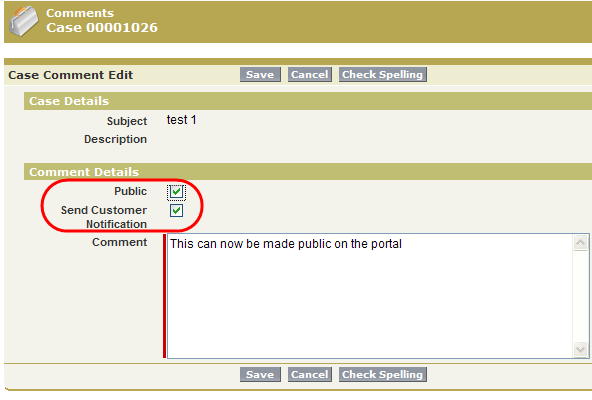
Enable Notification Email on New Case Comment – When this is enabled you also get the option to associate an email template. What this does is when someone on support adds a new Comment to Case, if they check the box to make it “Public,” they can also choose to check the box to send the Contact an email with a copy of the message (see screen shot below). This is great as it keeps the Contact in the loop letting them know that their Case is being worked, and saves the Support Agent time as they do not have to craft a separate email.
Enable Case Auto-Response Rules for Self-Service Cases – If you need to have Cases submitted over the SSP adhere to Auto-Response Rules, you’ll need to check this box. You would use this if you needed to respond with different communications based on the information contained on the case (Auto-Response Rules use logic to determine which Case gets what email template). If you do not need this function, leave is blank and use a one-size-fits-all template in the next field below.
Case Creation Template – As Aforementioned, if you are not using Auto-Response Rules, select the email template that you will use to message back to the Portal User that their Case was successfully submitted.
Now let’s look at the section called “Page Settings”:
Probably the only area here you might want to explore here at this time is the Color Theme pick list. If you click the link called “View Color Theme Options” located to the right you can see how the different themes render. All these themes can be tweaked for your branding, but for now, just pick something that is close to your branding, or simply a theme you like best.
Lastly you will see a section called “Customize Terminology.”
On the Portal, you do not have to use the word “Case.” You can have it be a “Ticket” or something else if that vernacular is more appropriate. Solutions for example could be renamed “How Tos” or “Tips.” However, inside of Salesforce.com, those tabs will still be called a Cases and Solutions.
Use these fields in this section to change the terminology if you desire.
Once you’ve made your selections – Click the “Save” button!
Next up, Self-Service Portal Settings
Back to SSP Introduction
