Once you click save you should be back to Setup > App Setup > Customize > Self-Service > Self-Service Portal > Settings
Now let’s go through the options available on this page.
In the section labeled “Portal Page Sections” you are able to add branding (such as your company logo) to the Header and Footer of the self service portal.
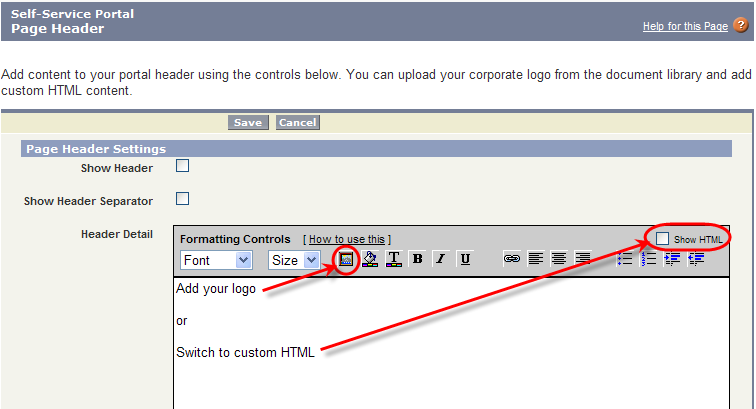
If you click the “Edit” link by the “Page Header” you will see a new interface displayed that should look familiar for those who have created HTML emails. You can click the picture icon to add an image (the image needs to be stored as a document in the Document folder by the way), or you can click the checkbox to the far right and switch to full blown HTML for greater control. You do not have to do a lot of customization, but I would encourage you to at least add your company logo.
You will also see checkboxes at the top of the page “Show Header” and “Show Header Separator.” Show Header has to be checked for any customization that you do on this page to show on the Self-Service Portal. “Show Header Separator” simply draws a line break between the header and the tabs available on the portal.
Click the “Save” button when you are customizing the Header. The process to customize the Footer is the same.
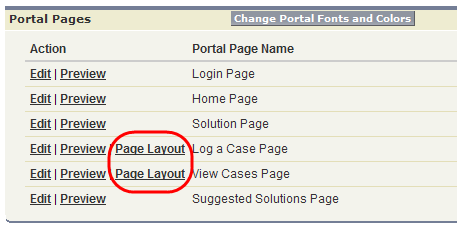
The next section is the Portal Pages. For every tab on the Self-Service Portal there is a page you can customize as well as the Login and Home.
The “Log a Case” and “View a Case” pages have a page layout, the others do not. First let’s look at a tab that does not have a page layout.
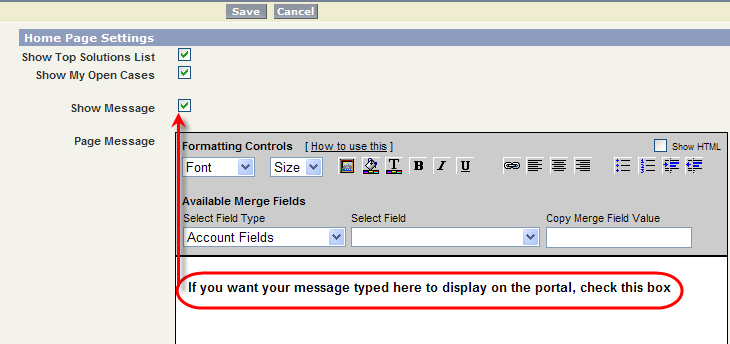
Here are the options for the Home Page.
You will notice a couple of checkboxes at the top:
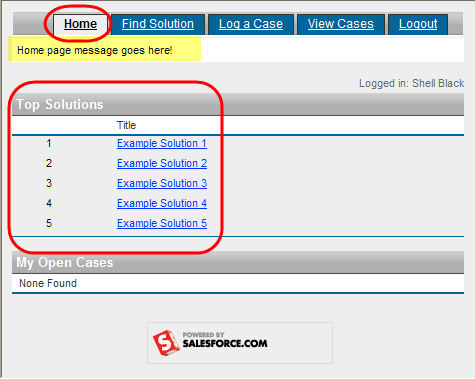
Show Top Solutions List – You can have up to Five Solutions displayed on the home page. This is a neat little feature to display “What’s New” or “Recently Added”, or display the most requested solutions to save Users time. You chose to have this shown by checking the box. You pick the Top Solutions to display a little later in this tutorial.
Show My Open Cases – Shows the Open Cases for the User Currently logged into the Portal
Show Message – You guessed it. The content that you add in the section called “Page Message” will not display on the Self-Service Portal unless you check this box.
The settings for the other tabs are very similar. All of them allow for a message which can be helpful if you need to provide additional instructions or messaging. Some people add a “Welcome” message to the Home tab.
There is a “Show Solution Page” checkbox on the Solution Tab. If this box is NOT checked the tab does not appear on the Portal.
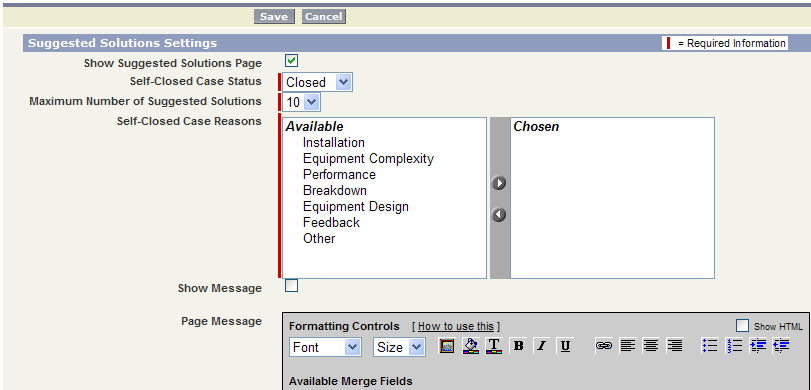
The Suggested Solutions Page is pretty unique. You can have Solutions automatically presented to the Portal User after they create a Case. Salesforce attempts to match the content of the Case with the content of the Solutions in your knowledge base. From this page you can enable this feature and dictate how many suggested solutions you want displayed.
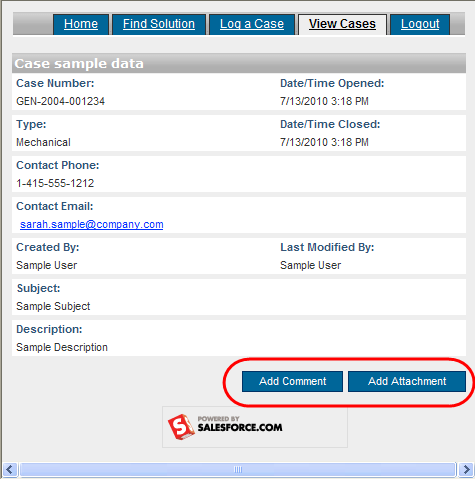
The “View a Case” tab has some additional interesting options.
Add Comments to Cases – If checked, once a Case has been created, a Portal User can go back and add additional comments on a Case. This is a nice feature as the internal support agent working the case may have left a comment and the Portal User can respond (it’s like a very slow chat session!).
Add Attachments to Cases – Another nice feature. The Portal User, after creating a Case, can go back to the open case and add an attachment.
Lastly let’s look at the Log a Case and View a Case tabs.
You’ll notice both have an option for Page Layout. Clicking the link launches the Page Layout wizard with your Case fields made available. I won’t get into how to use this interface in this discussion, but you’ll need to configure both page layouts.
The fields that display on the Portal are just a subset of the fields available inside Salesforce.com on the Case Object. The page layout available for the Self Service Portal is not fancy – either two columns, a single column or a mixture of both.
What information do you need to capture on a Case to be able to respond to a customer (think fields)? Call Centers like a “One and Done” resolution goal. They strive for resolution with one response to the customer. Asking all the required information up front speeds up resolution time with fewer touches to the customer.
When thinking of what information you would like to capture on a Case, keep in mind what you might want to report on down the road (e.g. nature of the issue, severity, fields that categorize the types of inquiries).
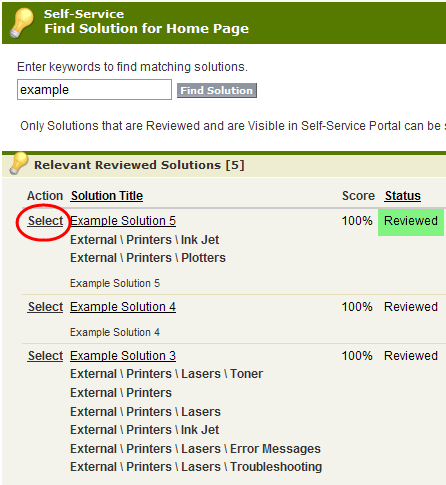
OK, one last thing to look at on Go to Setup > App Setup > Customize > Self-Service > Self-Service Portal > Settings. At the bottom of the page you will see a section called “Top Solutions.” You can add up to five (5) Top Solutions. If you have the feature enabled on your Home page (mentioned above), these will be displayed when a User logs into the Self-Service Portal. Simply click the link labeled “Add” and browse to the Solution you want to use and click “Select” by the name of the Solution.
If you do not see the option to “Select” a solution as pictured above – check two things on the solution. Be sure it is in a “Reviewed” Status and that the checkbox labeled “Visible in Self-Service Portal” is checked.
Next up, Enabling Users
Back to Configure
