Continuing on with our tutorial, let’s look at WHAT Salesforce can do when workflow triggers. Or, go back an review setting Workflow Evaluation and Rule Criteria.
WHAT action needs to happen?
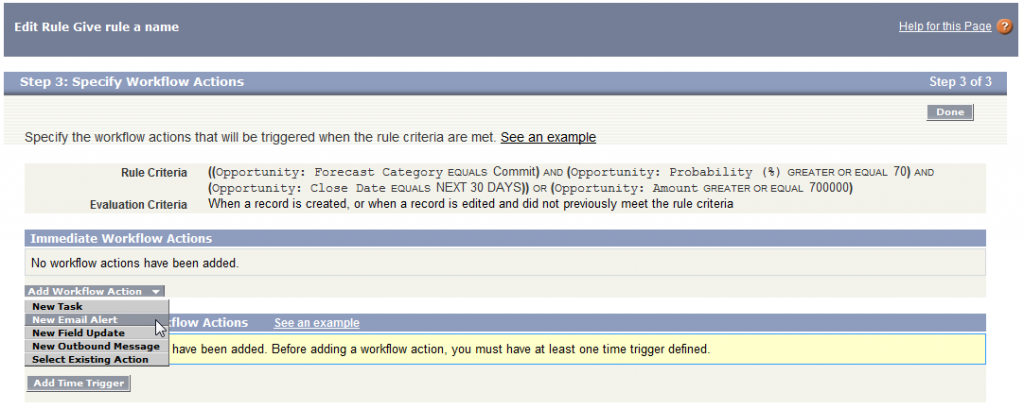
On the next screen you determine what action needs to occur when the rule fires / triggers. You can have a single actions (e.g. send an email) or multiple actions (e.g. assign a Task to this person, send this email to this person, send a different email to their boss, and change the status on this record).
You can also have the actions fire instantly, or wait to fire for a few hours or even days. We will cover Time Based workflow a little later. First let’s look at the workflow actions.
The types of actions that can fire are:
- Send an Email
- Assign a Task
- Update a Field
- Send a message / communication to an external system
Let’s look at these actions individually:
Send an Email
When you select this action you’ll see a new screen where you will give the Action a description and select the email template that will be used. I won’t cover the creation of an email template here, but you’ll need that completed in advance to finish this action.
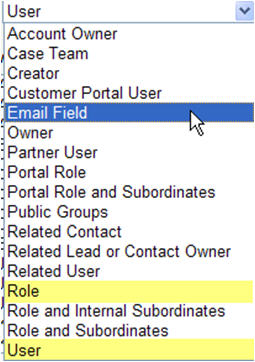
The options for the “Recipient Type” can be very flexible. In the screen shot below, you can see that you might have options (depending on your org) such as Portal Users and even Custom Email Fields that you have created for that object.
If the individual you want to email cannot be reached using the options under “Recipient Type,” Salesforce has a section at the bottom to add up to 5 additional email addresses. This is perfect for sending emails to people that are not Salesforce users (such as external vendors).
NOTE: For whatever reason, Salesforce does not log an Activity on the record when an email fires. A lot of clients want to know – did the workflow email get sent? To solve for this you can either add a User as an additional recipient of the email, or create a Task with a status of “Complete” with a Subject that says something along the lines of: “Workflow fired email XYZ.” How do you create a Task? See the next section…
Assign a Task
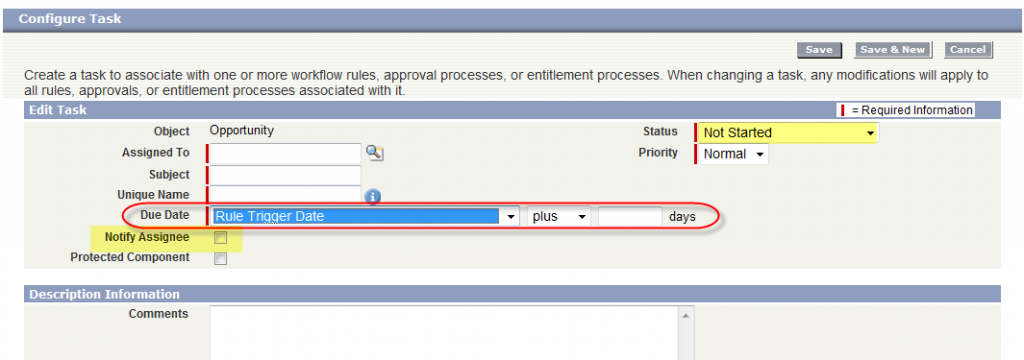
This section looks similar to creating a Task on any Object. You need to Assign the Task to someone – a User, the Record Creator, or a specific Role (which can be helpful if you have a lot of turnover!).
You need set the Status of the Task (e.g. Not Started, Completed). You also have the option of sending the person who was assigned the task a “heads up” email by checking the box “Notify Assignee,” which can be helpful if that individual is not working in Salesforce everyday.
Lastly you can set the Due Date on the activity based on date fields on the record (like the Opportunity Close Date), or simply the Date the rule triggered.
Field Update
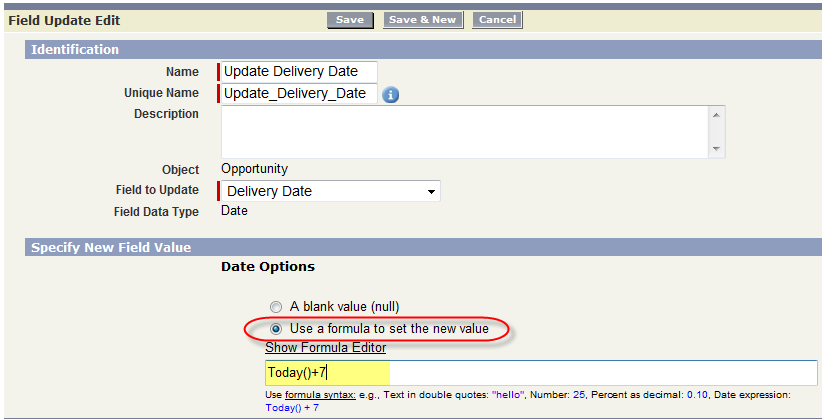
This is a handy option if you need a record to automatically fill in a value, or update a value because something changed on a record. For example maybe you want to populate a custom “Delivery Date” field on an Opportunity with a date seven days after the rep closes the Opportunity.
Here is an example of a field update that is using a formula to determine what the new value should be for a field:
Here is an example of a field update on a picklist:
Outbound Message
In my experience this is used infrequently, but can be a lifesaver at the right time. Basically you pick the fields you want transmitted and in the field “Endpoint URL” you specify the IP address of where you want to send the SOAP message. This is a one-way communication. It is a “fire and forget” action with no acknowledgement sent back to Salesforce. For more on defining outbound messages – see this Salesforce article.
Next, let’s look at Time-Based Workflow
For more on this subject, see our ShellBlack Whiteboard episode: Workflow Rules Part 2 – Immediate and Time Dependent Actions


