As we’ve covered in a previous blog post, the native mass transfer wizards for reassigning records to different users have their limitations. Changing record ownership is probably one of the more straightforward and simple tasks an Administrator can do using the Data Loader. Let’s take a look.
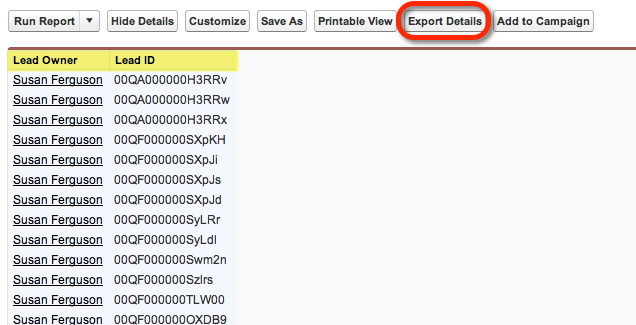
Let’s assume you have a couple thousand Leads you need to reassign from Susan to Bill. To grab the right records you’ll probably start by writing a report in Salesforce. The only two fields you need to have in your report are the Record Owner (Lead Owner) and the Record ID (Lead ID).
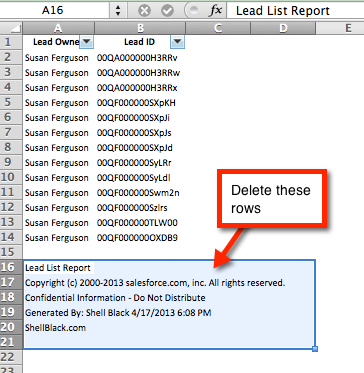
Export your report to Excel so you can prep your file for the Data Loader. In Excel, delete the report information from the bottom of the file.
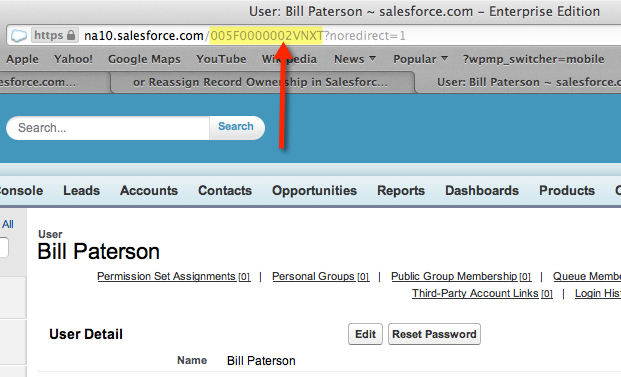
Next we need to get the Record ID for Bill (i.e. the User that will own the record after the update). Go to Setup > Administration Setup > Manage Users > Users and click on the record for the User.
In the URL we want to grab (cut) the ID out of the URL as highlighted in our screenshot below:
You want to grab the information after “Salesforce.com/” up to “?noredirect=1″ as shown in bold font below:
https://na10.salesforce.com/005F0000002VNXT?noredirect=1
USELESS TIP: If you change the value in the “noredirect” to “0” you’ll go to the User’s Chatter page.
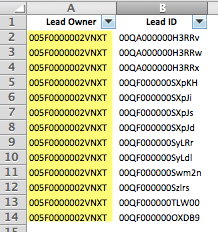
Once you have the Salesforce ID for that User, you’ll paste that value into your Excel spreadsheet in the Record Owner column
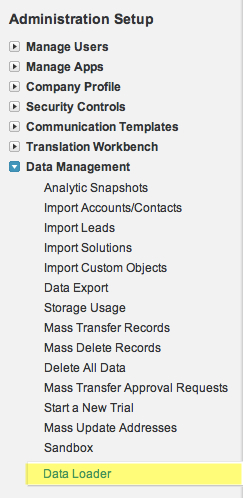
Then you’ll that save the file in a .CSV format (Save As) on your computer where you can find it later with the Data Loader. If you’re a PC user and don’t have a copy of the Data Loader, go to Setup > Administration Setup > Data Management > Data Loader to download it to your PC. If you’re a Mac User, like myself, I would use the Lexi Loader by Simon Fell available at: http://www.pocketsoap.com/osx/lexiloader/
Once you’ve fired up the Data Loader (how to login here), you’ll want to do an Update command.
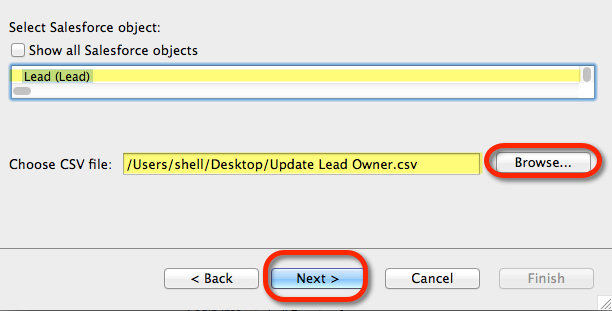
Select the object you want to update (in this example we’ll update Lead records), and browse to the location that has your update file that you prepped above, then click “Next.”
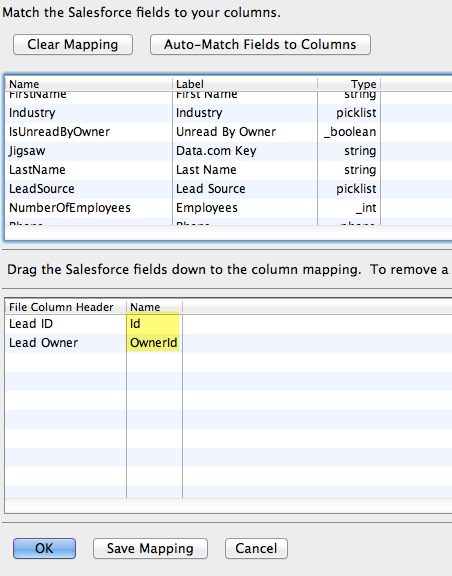
You will only have to map two fields – the Record ID (Id) and the Record Owner ID (OwnerId) as in the screenshot below, then click “OK.”
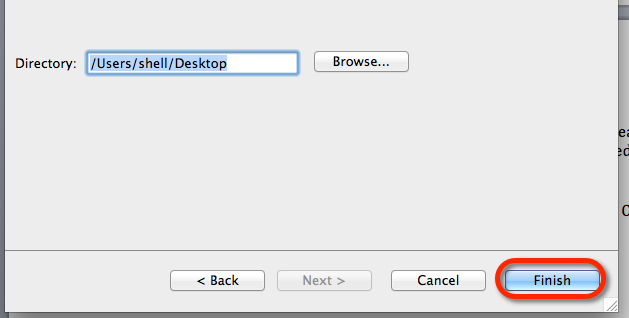
Then you’ll pick a location to save any Error or Success files and click “Finish” to let the update rip! The update will happen as fast as your internet connection.
That’s it!
Other blog post tutorials on how to use the Data Loader:
