HTML email templates are a great way to control your branding and make your Salesforce Users more efficient by providing pre-scripted communications for items such as invitations, newsletters, proposals, and introductions. Plus they have the added benefit of letting your users see if their email was received and opened.
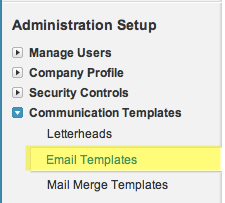
We created a branded Letterhead in our previous tutorial, so now we can now make a HTML email that leverages that letterhead. To get started we are going to go to Setup > Administration Setup > Communication Templates > Email Templates.
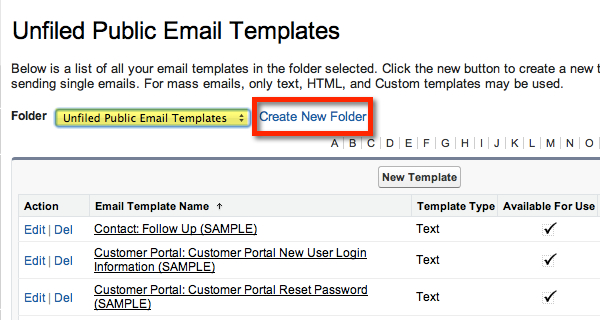
On the right of the screen you’ll probably see a bunch of email templates that come “out of the box” and placed in a folder called “Unfiled Public Email Templates.” To keep things tidy, let’s create a new folder for our HTML emails that leverage our letterhead by clicking the “Create New Folder” link as highlighted in the screenshot below.
On the next screen I’ll give my folder a name, make sure it’s available to all my users, and click “Save.”
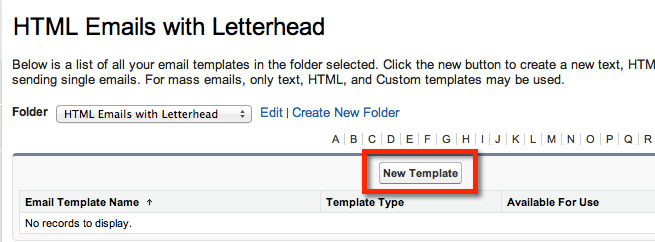
Now that we’re in our new folder, let’s click the “New Template” button.
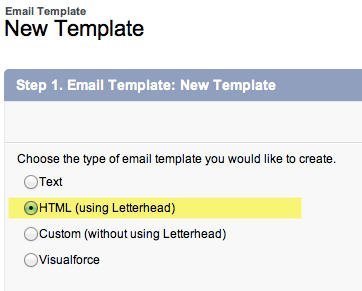
In Step 1 of the wizard, select the radio button option for “HTML (using Letterhead)” and click “Next.” If you want to see what “Custom (without using Letterhead) does, see this tutorial on creating a full HTML email from scratch.
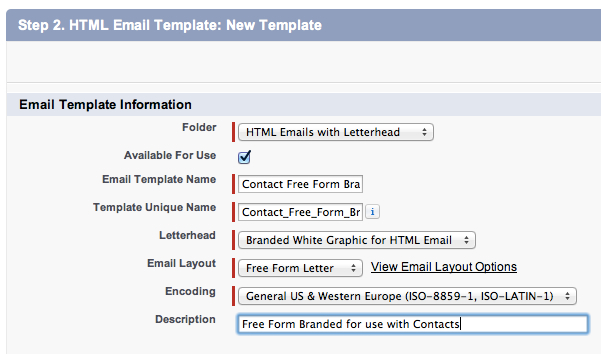
In Step 2 of the wizard, you’ll give your email a name, select the letterhead that you created in the previous tutorial, click the “Available for Use” box (otherwise it won’t be published and users won’t be able to find the template when they go to send an email from Salesforce), select a layout, and add a description.
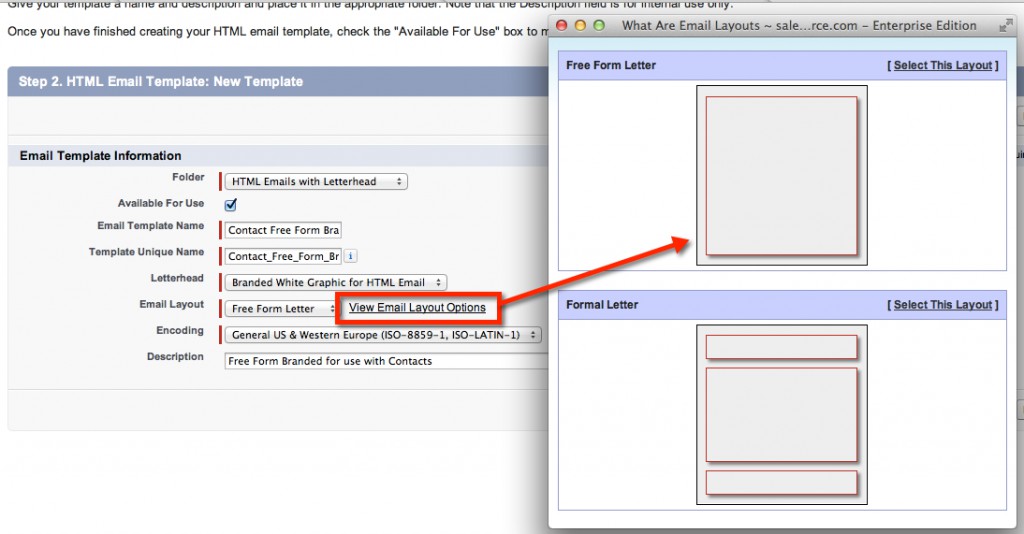
If you click the link to “View Email Options” you’ll see that you can choose from designs that have a single or multiple text boxes for the body of the letter. Since we want a single large text box, we’ll choose “Free Form Letter.” Then click “Next.”
In Step 3 we can start work on editing the Subject line and the body (content) of our email template.
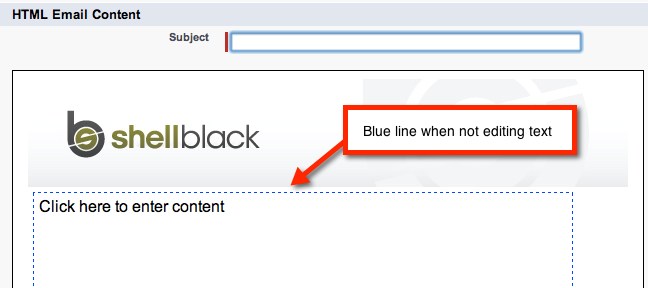
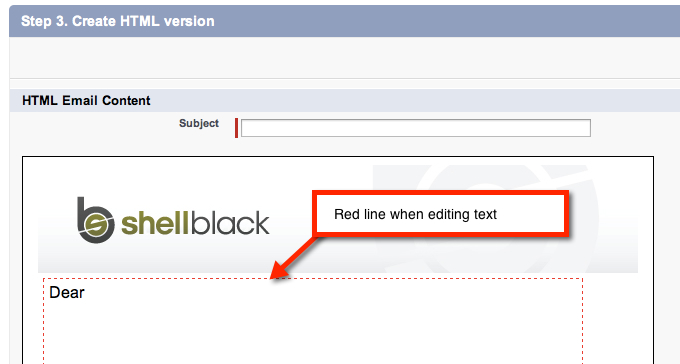
TIP: Try not to “cut and paste” content from MS Word as you run the risk of copying in hidden formatting which will can give you undesirable results. Some folks like to use a plain text editor to be sure they don’t carry over any hidden formatting, or, just start typing directly into the email template. You’ll notice when you click once inside the body of the template the border changes from blue to red (edit mode).
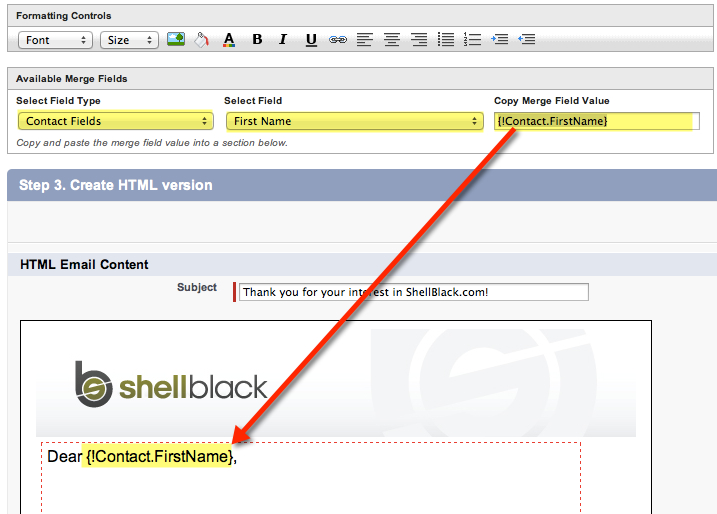
I’ll add a subject line, and then I want to personalize the email by merging in the First Name of the Contact. To do that in the “Available Merge Fields” box, I’ll first select the Contact object from the far left picklist labeled “Select Field Type.” Once I’ve done that notice the middle picklist box labeled “Select Fields” reflects the native and custom fields available from the Contact object. I’ll select the “First Name” field (by clicking it), which in turn displays the {!Contact.FirstName} in the “Copy Merge Field Value” box. To get this merge field into our HTML email, copy {!Contact.FirstName} from the “Copy Merge Field Value” box and paste it into the body of our email as pictured below.
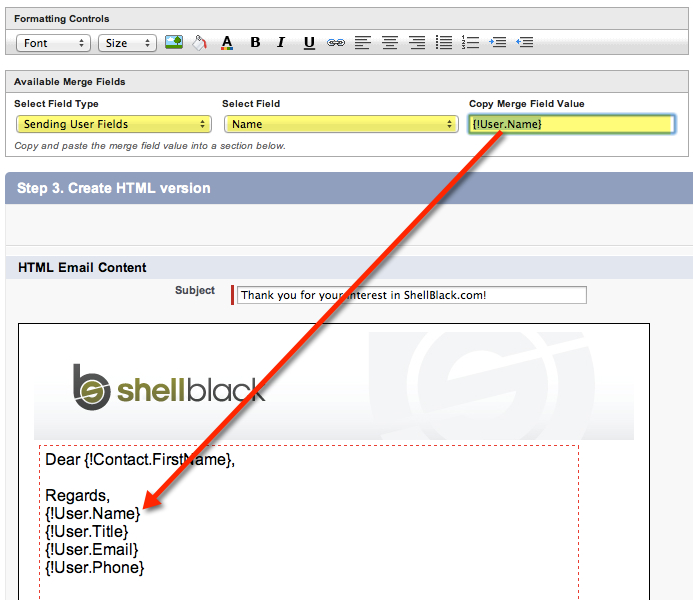
Now let’s make a dynamic signature block at the bottom of our email. This time in the “Select Field Type” picklist select “Sending User Fields” and let’s pick the Name, Title, Phone and Email fields and add the corresponding merge fields to our template as pictured below.
Of course for this dynamic signature to work well for all Users, make sure those fields are maintained on the user record for all your users.
TIP: You can also merge fields into the Subject Line!
Now that our mail merge fields are finished, we can add additional content to our email template and leverage the formatting palette to control things like bullet points, indentation, text formatting, and add images.
When done, click the “Next” button to finish our email template.
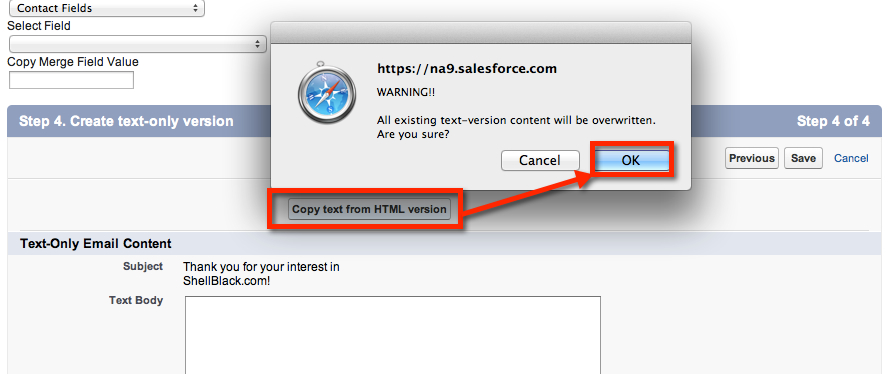
On Step 4 you’ll see a button to copy the Text from our HTML page in Step 3 to a text-only version of our email body. You’ll get a warning like in the screenshot below – click OK.
Notice that just the text from Step 3 was copied over, and that’s the purpose of this page. If you by chance send an email to a Contact whose company does not allow HTML emails to be delivered to their employees, you’ll want to setup a text only version of your email to be sure your message still gets received. Think of it as a backup to the your spiffy HTML version. Click “Save.”
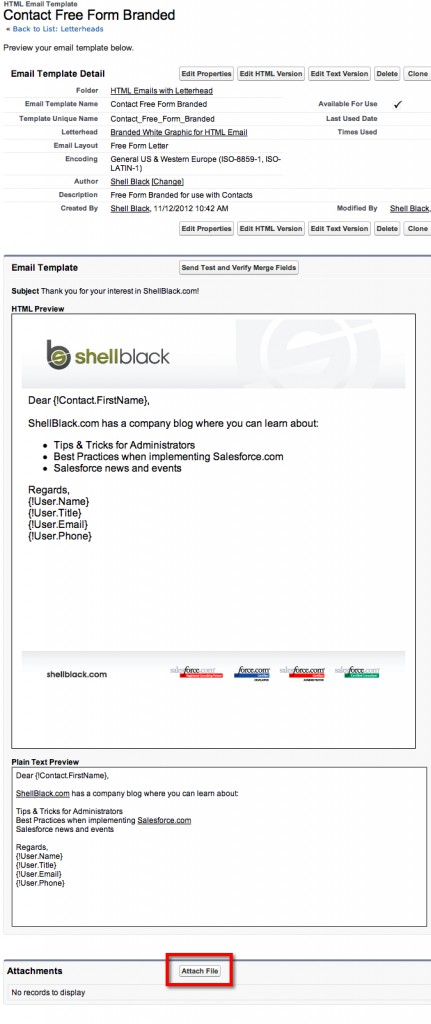
You’ll return to your email template. If you scroll ALL the way to the bottom of the page as in the screenshot below you’ll notice you can also preload one or many attachments to your HTML email. For example you could add a product slick or your company’s Terms and Conditions to go along with a proposal. You are limited to 5MB per attachment.
So let’s test out our new template. From a Contact record, click the “Send Email” button from the Activity History related list.
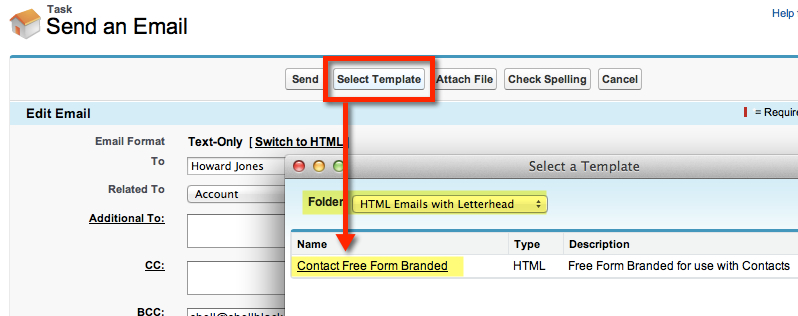
From the email editor screen I’m going to click the “Select Template” button and choose our new email template (make sure you’ve selected the correct email folder!).
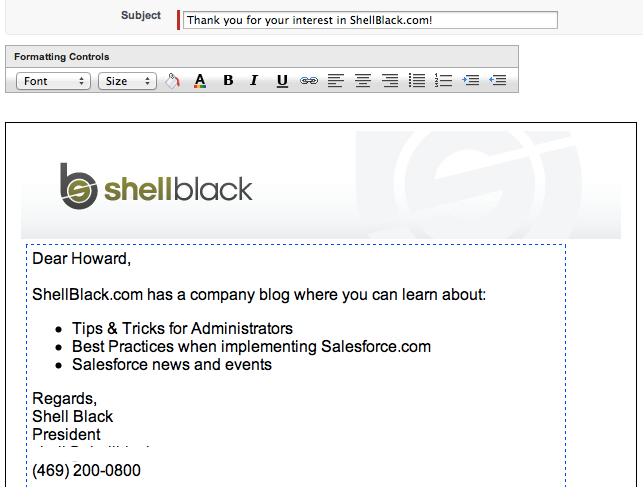
Viola! Our new HTML email template loads and mail merges in our Contact’s first name along with the sending User’s information.
The user can drop in their cursor and add additional information to the body of the email to personalize the communication further, or click “Send”!
Want to learn how to send a mass email?
This blog post is for advanced users, but you can actually use the Data Loader and the API to make the email template wider than 550 pixels.
