Custom Report Links are a cool usability feature – it provides your Salesforce.com Users the ability to quickly retrieve report data based on the record they’re currently viewing. A custom report link is simply a custom link that launches a report rather than a query out to the web (like Google maps or Weather.com).
Some standard Custom Links:
Custom Report Links leverages the Salesforce Record ID to query information about the record you are viewing, and depending on how you wrote the report, data in related objects – whether standard or custom. For example, if you are viewing an Account, you can run a report from the Account record to see sales to date (Opportunities – Standard Object), if there are any open support tickets (Cases – Standard Object), or if they are participating in any marketing co-op programs (a Custom Object).
Let’s take an example to drive the concept home. Let’s create a custom link from the Account record page layout that will allow us to see a pipeline report from the Account record instead of having to go to the Report Tab.
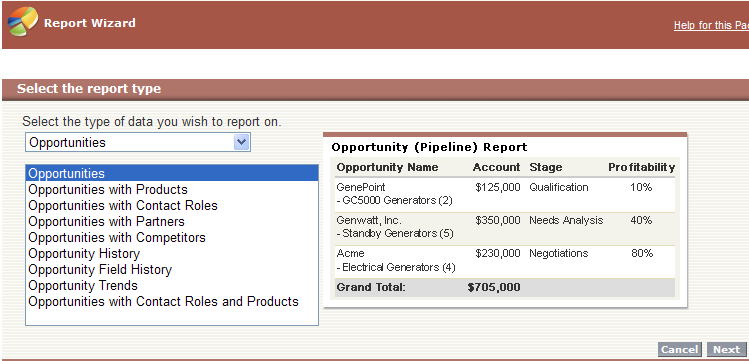
First step is to have Salesforce running in two tabs in your web browser as you’ll be copying information between the two tabs when creating your Custom Report Link. In one tab, go to the Reports Tab and start create an Opportunity pipeline report (Opportunities Status = Open), or modify one of the “canned” pipeline reports that come with Salesforce.
Find an Account on the report that has a few Opportunities on the report.
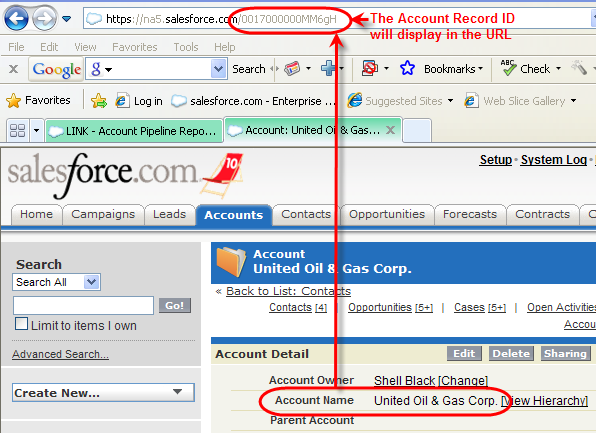
Then in a separate tab in your browser, search for an Account that has a few open Opportunities. While viewing the Account record, look for the Record ID that displays in the URL in your browser. Highlight the record ID with your mouse and CTRL+C (Copy) the Record ID out of the URL into memory. For example, if the URL is https://na2.salesforce.com/0017000000MM6gH, “0017000000MM6gH” is the value you want to copy into memory.
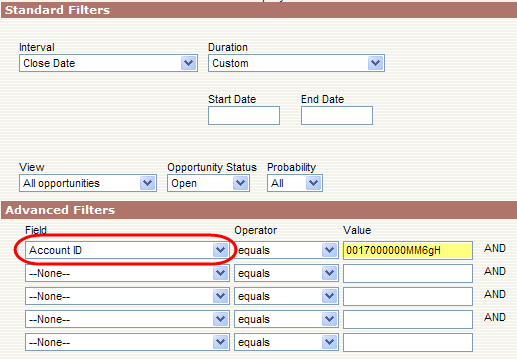
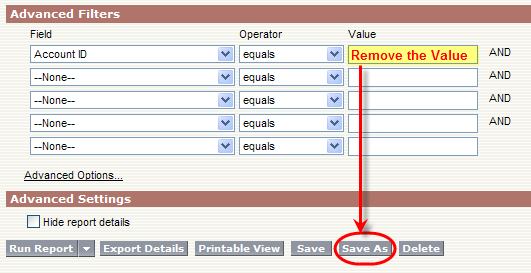
Now switch tabs back to your Opportunity Report and modify the report criteria to query on the “Account ID” as in the screen shot below.
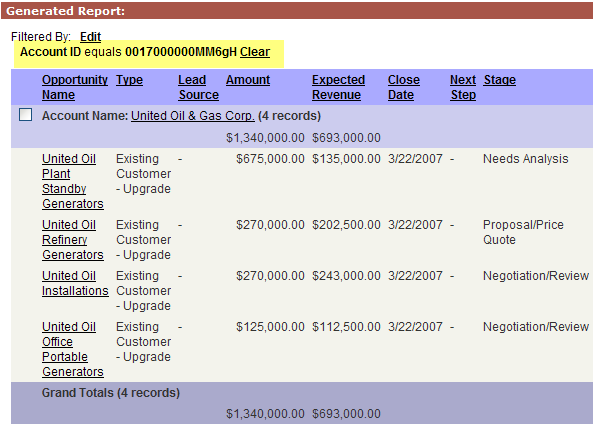
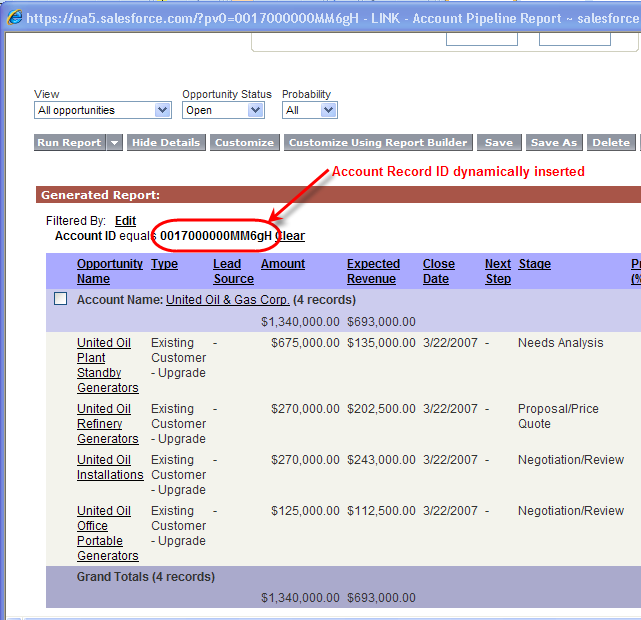
Now “Run” the report. You should see a result similar to the screen shot below.
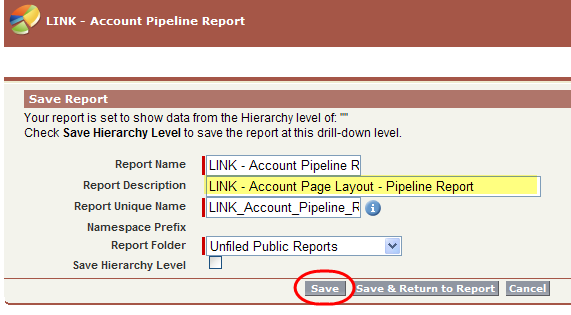
Now that we know the report is working correctly, let’s remove the Record ID in the Value field and save the Report.
As a Best Practice, I would encourage you to come up with a naming convention to identify certain reports are being leveraged as Custom Report Links. I just start the name with “LINK.” You might also hide them in a folder that only the Administrator can edit to be sure Users don’t save over the report or delete it – which will break your report link.
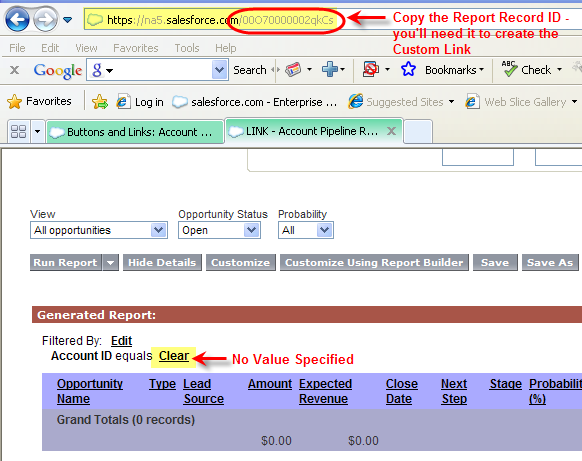
Run the Report. You should get no results. Copy the Report Link into memory. For example if the link in the URL is: https://na5.salesforce.com/00O70000002qkCs you will want to do a CTRL+C and copy this part of the URL that ends with “/00O70000002qkCs.” You will need this to create the Report Link.
Now let’s create the Custom Report Link for the Account Page Layout.
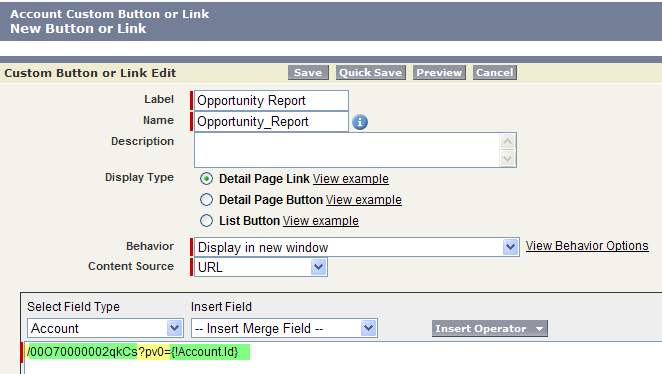
Go to Setup > App Setup > Customize > Accounts > Buttons and Links, then in the Window on the right, click the “New” button in the Custom Buttons and Links list.
Here is the syntax for the Custom Link:
/00O70000002qkCs?pv0={!Account.Id}
or
“/”+”Report Record ID” + “?pv0=”+ “Account ID field”
So what is “?pv0=” ? “PV” stands for parameter value. What we are doing is dynamically inserting a parameter value into the first filter criteria on our report – in this case the Account ID. So, for whatever Account we are viewing when we click the Custom Report Link, the Account ID will be inserted into the query criteria and therefore the report only displays records related to that Account. Genius!
If you have configured the link as in the screenshot above, then click the “Save” button.
Now let’s add the Custom Link to our page layout.
Setup > App Setup > Customize > Accounts > Page Layouts
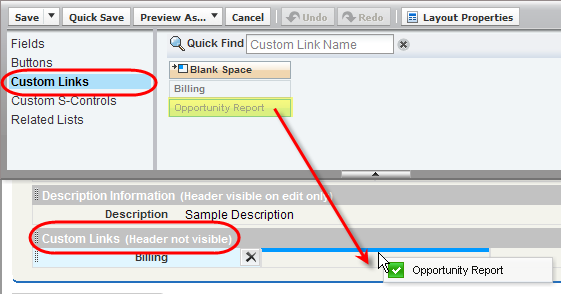
From the Page Layout editor, make sure you have selected the Custom Links from the options available in the top left of the interface so that you can find your new Custom Link. Once you have found the Custom Link from the chooser, drag the selection into the Custom Links Section of the Page Layout and Click Save. The above assumes you only have one Account Page layout. If you have multiple Record Types and Page Layouts, you might have to repeat that process if you need your Custom Report Link displayed on multiple Account Page Layouts.
Now you’re ready to try out your Custom Report Link!
Find an Account that you know has some Opportunities related to it and navigate to the Custom Link section at the bottom of the record. Click on your new “Opportunities Report” link.
Viola! A window should pop and the Opportunity Report should run for that Account Record.
Notice that the Account Record ID was dynamically inserted
You can have multiple parameter values in one string, such as:
/00O70000001SOsa?pv0={!Account.Id}&pv1={!Case.IsClosed}
Things to Note:
This process works for any Standard or Custom Objects – you do not have to limit Custom Report Links to Accounts.
Tips:
Did you know that you can dynamically search the Documents folder using a report link?
The use case I had was that from a custom object I needed to query a zip code to find which vendors serviced a specific zip code. In the document folder we had MS Word and Excel files of the zip codes serviced by these vendors (one document per vendor) in a specific document folder.
Below is the syntax of the Custom Link that I created for the Custom Object, which with one click, would search a specific Document folder and bring back all the documents that matched the query.
/ui/doc/Search?searchtype=C&search={!CustomObjectName__c.CustomZipCodeField__c}&go=Find+Document
Part of the “magic” is that when you search the document folder Salesforce now searches the content of the document as well as the file name.
Here is a link to a pdf from Salesforcce with some additional information on building custom links.

