Next let’s look how to delay our workflow actions. Or, go back and review our post on configuring Workflow Actions.
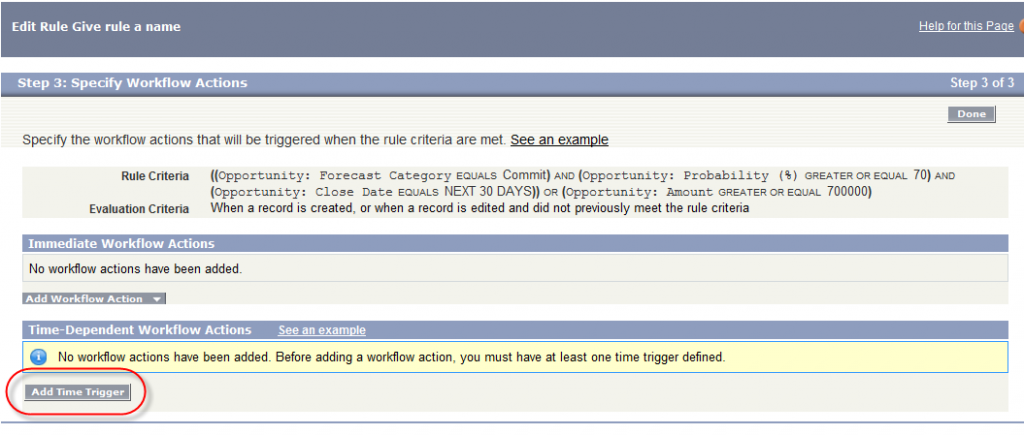
All the Actions above can fire instantly, or you can have them wait for a period of time before they fire. To setup a delay in the workflow action, click the “Add Time Trigger” button.
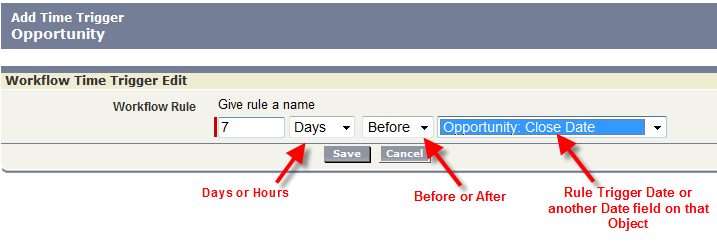
The next screen asks you to set the length of the delay in hours and days. Minutes is not available and even when you select hour, it can be anytime during that hour depending on what Saleforce is dealing with at that time. Don’t expect the workflow to fire a 1PM sharp!
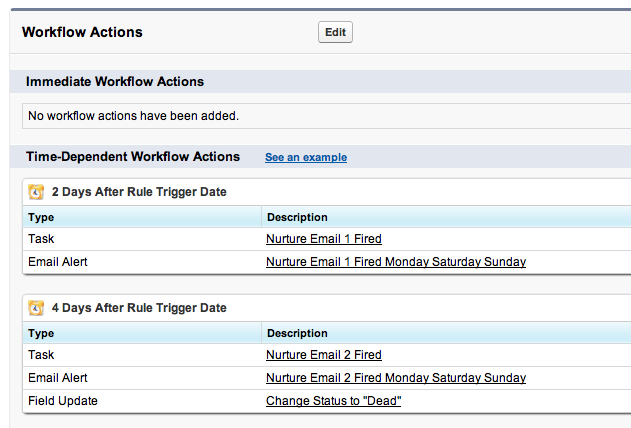
After that you create your Actions as you did in the Immediate Action section.
NOTE: One workflow rule can have multiple immediate actions and time delayed actions.
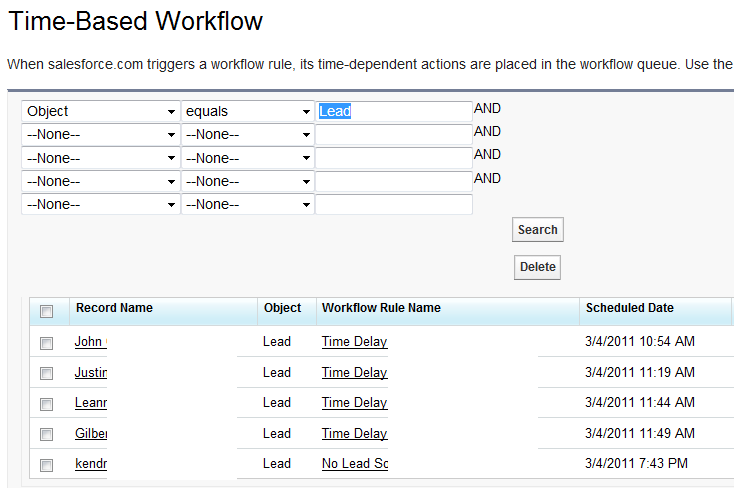
You can actually see time delayed workflow actions that are “queued” up to fire by going to Setup > Administration Setup > Monitoring > Time Based Workflow
In the screen to the left you will need to specify which object you want to monitor (Leads, Opportunities, etc).
Things to consider:
- You can only update a field on the object the rule is evaluating (no cross-object field updates)
- If the data you need to evaluate is on a related object, you’ll need to pull the information over to the object the workflow is evaluating with a formula field (where the value equals the field on the related object)
- Workflow WILL NOT fire another workflow rule. You can not specify the order in which workflow fires. For example if workflow rule number one updates a field with the value “X,” and workflow rule number two is monitoring the same field for a value of “X,” the second workflow rule will not fire.
For more on this subject, see our ShellBlack Whiteboard episode: Workflow Rules Part 2 – Immediate and Time Dependent Actions


