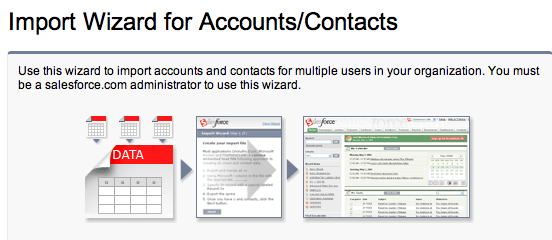
By far, Accounts and Contacts are the most popular set of records to be imported into Salesforce.com when you “move in.” Most likely Accounts and Contacts are your customers, but very well may also include your partners, vendors and even your competitors! Importing legacy data is typically the very last step prior to training end users when a company goes live. On day one you want users interacting with customer records (i.e. selling!) rather than spending a lot of time manually entering in their contacts.
If you’re migrating from an existing CRM and you need to import records other than Accounts and Contacts (e.g. historical activities, Opportunities, notes, and attachments), you won’t be able to use the wizard below. If that’s the case, please contact us about the data migration services we provide.
Identifying the sources of your customer data and determining its value is the first step, and as you’ve found out – it’s an eye opener. The next step is to get the data into a format (csv file) that you can use to actually do the import using the import wizard in Salesforce.
Setup > Administration Setup > Data Management > Import Accounts and Contacts
When preparing an import file I think the more important thing to consider is how complete is the record. If the information is sparse, it won’t have that much value in Salesforce to your Users. You might set some ground rules for a record to make the cut to be imported. For example, a Contact might need to have a least a phone number or email address and an Account might need to at least have a complete mailing address or a direct phone number.
Once you have all the records in a single spreadsheet you’ll need to try to identify and remove duplicates. Start by sorting by email address, phone numbers, addresses, etc. Duplicates happens more than you think – A/P has the Contact as “Robert Johnson” but the Salesperson had the Contact as “Bob Johnson,” so you’ve got a duplicate record.
Next, you’ll want to spend some time getting the formatting consistent – especially addresses (e.g. TX vs Texas). Also make sure that your zip codes are 7 digits (watch for zips that lead with “0” and make sure the “0” does not get dropped). Make sure phone and fax numbers have area codes. Email addresses need to be valid syntax (e.g. sampleemailaddress@domain.com <- must have “@” and “.” something). If you enter someone’s name in ALL CAPS in the spreadsheet, they will come into Salesforce in ALL CAPS.
Lastly, save your spreadsheet as a “.CSV” file. This will strip out any hidden formatting from “cut & pastes.”
The good news is that this is not a last and final opportunity to import data into Salesforce, nor is it that hard to hand-enter information if a record inadvertently gets left out of the import. I do suggest putting the effort up front to get a good data set in at the start so the Users can be up and running quickly.
To get you going, at the bottom of this post I’ve attached a Sample Import Template in Excel with some sample data as an example. NOTE: Don’t forget to do a “Save As” and change the extension on the sample file to a .csv before trying to import! A couple of things to note on the template:
- Accounts & Contact records have a field in Salesforce for record ownership Column “A” & “S” on the spreadsheet). If salespeople have assigned accounts, we will leverage these columns to make sure the Accounts are assigned to the right salesperson when we do the import. NOTE: during the import you can only select one column to be the record owner. If you use the import wizard you can’t specify a separate Account owner and Contact owner.
- Notice that to import several Contacts against the same Account you’ll have multiple rows on the spreadsheet. For example rows 3,4, and 5 are all for “United Oil & Gas Corp.” but each row is for a different Contact.
- You can add as many columns as you need to the spreadsheet to capture custom fields (e.g. columns O,P,Q,R for Accounts and columns AI,AJ, AK, AL for Contacts in the sample template).
- What the template does not show is what is the minimum amount of information required to create a record in Salesforce – which is very little. An Account requires only the Company Name, and a Contact only requires First and Last name. That being said, if that is all the information you have on a record (Company name and a First and Last name), I’d challenge you whether that has any value being imported into Salesforce.
- Note that you cannot have “orphaned” Contacts in Salesforce. You need an “Account” to create a Contact in Salesforce. So if you only have “John Doe,” in Outlook, but don’t know the company he works for, you would exclude him from the import. Let’s say “John Doe” is a broker (self employed) – then the Account would be “John Doe” (he is the company!).
- Add a column called “Account Site” if you have multiple physical locations but the Account name is the same. The Account Site field can you can tell Users at a glance the location of the company in search and reports. The Account Site becomes the label you use to describe that location quickly (e.g. North American Headquarters, Eastern Divisional Office, Chicago Branch, etc).
- You don’t have to have a value for all the fields on my template – for example “Industry” (column E) might not be applicable.
![]() <– this downloads an “.xls” file so don’t forget to change the extension to “.csv” before importing into Salesforce!
<– this downloads an “.xls” file so don’t forget to change the extension to “.csv” before importing into Salesforce!
