Continuing our little series on Data Loader basics, let’s look at deleting records. The use cases are many. Maybe you performed an import incorrectly that you need to blow out, or free up some storage space in your org by purging some old junk records.
You have the option of using the Mass Delete wizard that comes with Salesforce found in Setup > Administration Setup > Data Management > Mass Delete Records, but that limits you to deleting only 250 records at a time. If you need to delete thousands of records, that’s just not going to cut it. Additionally the Mass Delete wizards only allows you to delete Accounts, Contacts, Leads, Activities, Cases, Solutions, and Products. What if you need to delete Campaign Members or records in a Custom Object – you need the Data Loader!
To get started you can get the Data Loader through Setup > Administration Setup > Data Management > Data Loader and learn how to login here.
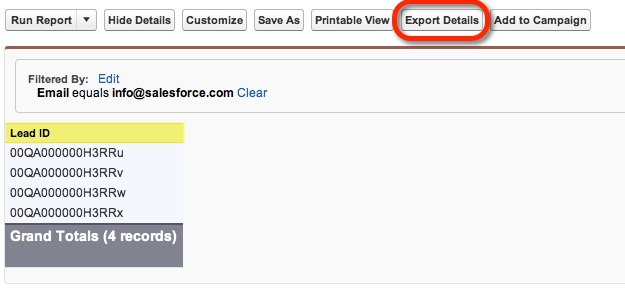
The easiest way to prepare a file to delete records is to write a report to get the subset of records you’d like to delete. In this example we’re going to grab a handful of Lead records. The only column you need in the report is the Lead ID field (Record ID).
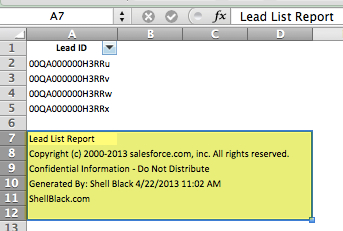
Once you have the records you’d like to delete on your report, click the “Export Details” button and then open the report in Excel. Then remove the rows at the bottom of the file that have the Salesforce report information.
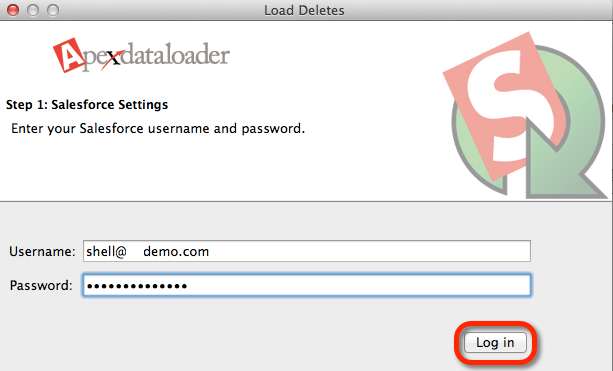
Next save your file on your computer in a “.csv” format where you can find it with the Data Loader. Log into the Data Loader.
In the Data Loader main menu click the “Delete” button. If you want to learn about that grayed out “Hard Delete” button to the right of the “Delete” button and how to turn that option on – see the next post on how to recover and restore records deleted with the Data Loader.
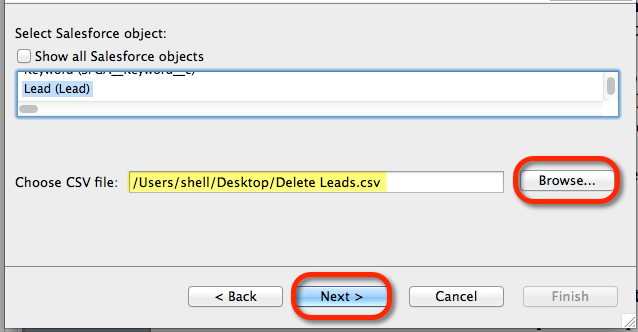
In the wizard, select the object that has the records you want to delete (in our case the Lead Object), and then browse to the .csv file on your computer that has the list of Lead IDs targeted for deletion and click “Next.”
Now we need to map our ID field. Click the “Create or Edit a Map” button.
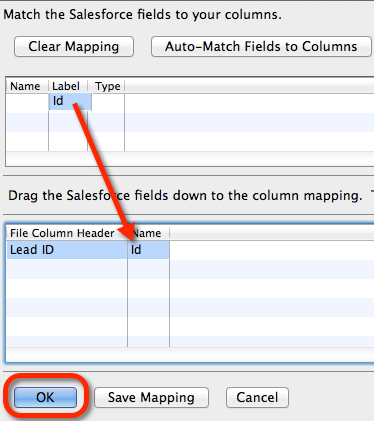
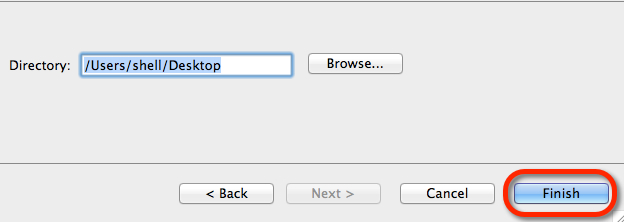
Map the ID field by dragging it from the list at the top down to the section below as seen in the screen shot. Then click “OK,” then “Next.” Lastly, specify where you want to store the success and error files on your computer and click “Finish” to perform the delete.
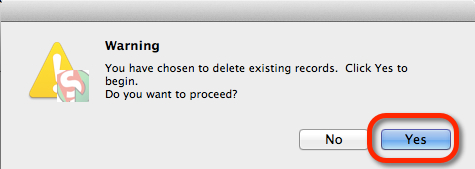
You’ll get a Warning Message saying you’re about to delete records – click “Yes” to confirm and proceed.
You’ll get a second warning that is saying that if you delete more records than can be stored in your recycle bin (for most orgs with the standard 1GB of storage, that’s 25,000 records), those records can not be recovered after 2 hours of being deleted (we’ll show you in our next tutorial how to recover deleted records using the Data Loader). Click “Yes” if you’re absolutely sure.
That’s it!
Other blog post tutorials on how to use the Data Loader:
