In the life of being a Salesforce Administrator you’re going to need to recover and restore records that have been deleted – either by a User, yourself or another administrator. Deleted records go to your Recycle Bin. If you need to undelete a handful, it’s probably easy enough to do it manually from the Recycle Bin. If you need to grab thousands, I’d use the Data Loader. There is a caveat here. Depending on your timing and the number of records that were deleted, the Recycle Bin may not be able to save your bacon (ha – I did it. I used bacon in a blog post!). This blurb from Salesforce Help tells you the constraints in place for recovering records from the Recycle Bin:
…recently deleted records for 15 days before they are permanently deleted. Your Recycle Bin record limit is 25 times the Megabytes (MBs) in your storage. For example, if your organization has 1 GB of storage then your limit is 25 times 1000 MB or 25,000 records. If your organization reaches its Recycle Bin limit, Salesforce automatically removes the oldest records if they have been in the Recycle Bin for at least two hours.
If you have integrations or scheduled jobs that delete more records than your Recycle Bin’s capacity (or they use a “Hard Delete” API function – explained below), you might not be able to save the record.
The Data Loader has a function to “Hard Delete” records – essentially it deletes the record without putting it in the Recycle Bin. This is what Salesforce says about this operation in their documentation on the Data Loader:
If you REALLY want to do this (and there some valid reasons to do this especially with integrations that move BIG amounts of Data to improve performance), you’ll go into Settings in the Data Loader and click the box to Use the Bulk API.
Once you’ve done that you’ll notice you have the option not just to “Delete” but to “Hard Delete.” In the vast majority of use cases, you’re going to want the safety net of being able to recover a deleted record and simply use the “Delete” button.
OK, so how do we identify records that are in our Recycle Bin that we can recover? I’m going to use the “Export All” function in the Data Loader on our Lead object to find the records I deleted in our previous tutorial.
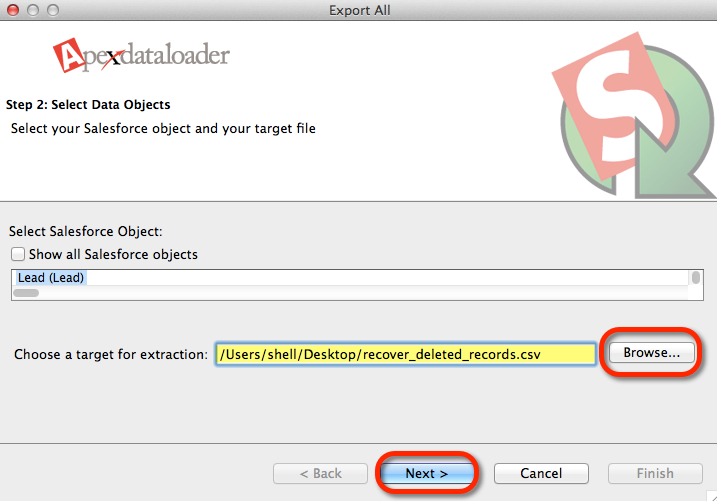
From the Data Loader main menu, click the “Export All” button (login if you need to). On the next screen you’ll pick the Object (in our case, the Lead Object) and choose where to put your export file (make sure you know where it’s saving so you can find it later).
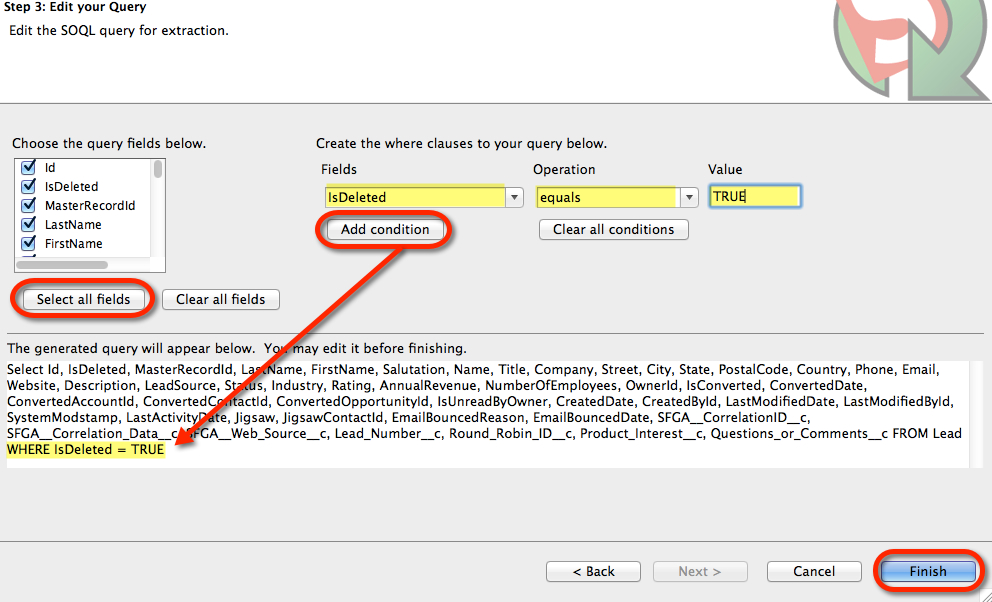
On the next screen we’re essentially going to make a recovery file. First click the “Select all fields” button to grab all the fields on your lead record. Then we’ll add a condition to our export query on the right top part of the screen to only export deleted records by selecting “Field” = IsDeleted, “Operation” = Equals, and “Value” = TRUE (as depicted in screenshot below) then click the “Add condition” button to add this extra parameter to our query. You can also write additional parameters into your Export query if you know the syntax. For example if you wanted to limit the results to a specific user you can add that as a condition by using the User’s Record ID in the Value field (e.g. LastModifiedByID – Equals – 00530000005fTs7). LastModifiedDate is another good field to leverage to specify a specific subset of records (i.e. the date the record was deleted). Click the “Finish” button to export the records along with all the fields on those records.
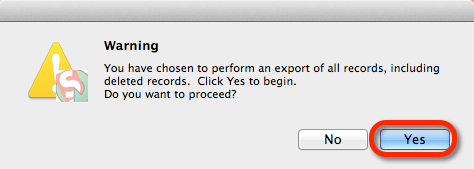
You’ll see a quick warning message – click “Yes” to proceed.
Open the export file in Excel. You’ll see that the records have a column called “IsDeleted” with the value set to TRUE.
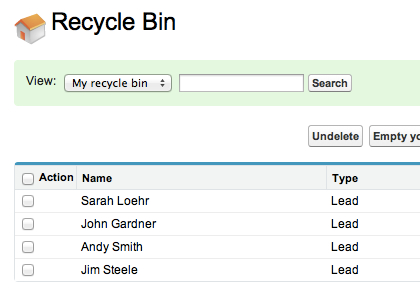
You’ll notice these records match the ones in our Recycle Bin.
I would like to say the solution at this point would be to flip the status of the IsDeleted field from TRUE to FALSE and use the Data Loader Update command to undelete the records. Unfortunately that field is not available to hit (map to) with the Data Loader. It seems to be a read only field. So our option really is to recreate the records using an Insert command with the Data Loader.
If you import the records the Salesforce system fields CreatedDate, CreatedByID, LastModifiedDate and LastModifiedByID will be today’s date and default to the User doing the import. However, you can open a Case with Salesforce to allow you to update these system fields with the Data Loader. That can take a couple of days, so plan ahead!
In the Data Loader main window pick the option to Insert records.
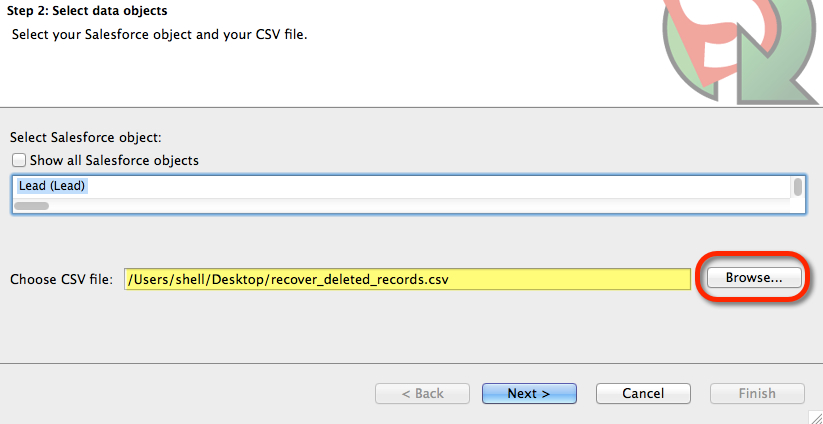
On the next screen – browse to the file you previously exported and select the object you want to insert records (in our example Leads).
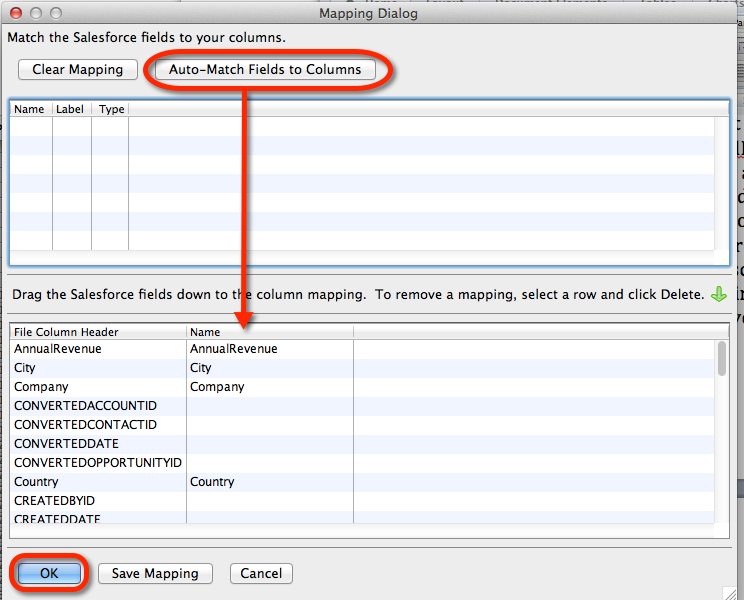
Click the button “Create or Edit Map.” On the next screen click the “Auto-Match Fields to Columns.” Since we started with an Export we should have the correct fields names and this will speed up our field mapping. Everything that can be mapped should Auto-Match as in our screen shot. Again, if you’ve opened a Case with Salesforce support, you’d be able to map to system fields as well. Once all the fields are mapped you can click “OK.”
On the next screen click “Next.” On step 4 of the wizard, you’ll pick the location on your computer to save your success and error files and then click “Finish.” Finally you’ll see a Warning message saying you’re about to insert records. Click “Yes” to proceed with the import.
That’s it! You’ve recovered the deleted records by importing them back into your Salesforce org using the Data Loader.
Other blog post tutorials on how to use the Data Loader:


