I recently had an email exchange with a Dallas User Group member who needed help getting her HTML emails to work. I find that most people get caught up on getting the images to render in the email. It takes a little bit of extra setup, but it’s not too hard. Here is the process.
First step is to the upload the images you want to display in your HTML email in the document folder – yes, the document folder! Hang in there, it will all make sense in a minute.
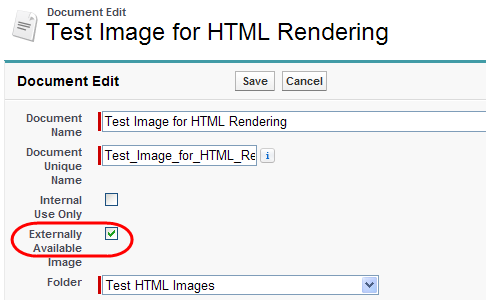
Make sure that you check the box to make it an “Externally Available Image” – this allows the image to be visible outside of your Salesforce instance.
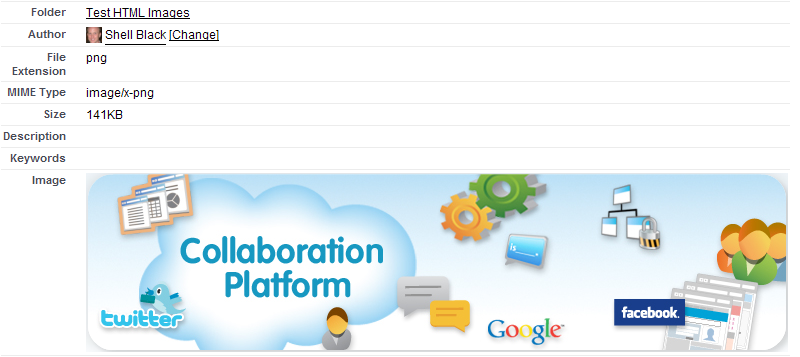
When you save the document, you should see the image displayed.
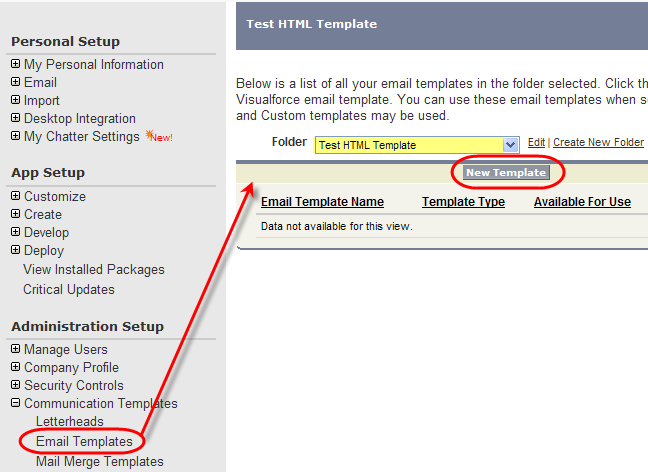
Now let’s switch to setting up the email template. Go to Setup > Administration Setup > Communication Templates > Email Templates. Navigate to whatever folder you have setup for your HTML email templates and click the “New Template” button.
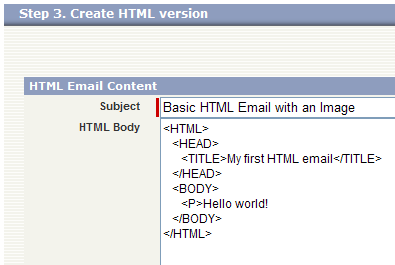
Select “Custom (without using letterhead),” and click the “Next” button. Give your template a name and click the box to make the template “Available for Use” and click the “Next” button. On Step 3 we have the opportunity to create the email. Put in a sample subject line and type in the following to establish the framework for our HTML email.
We need to add an HTML image tag to the framework above to pull in our graphic. Here is the basic structure of the image HTML tag, and the breakdown of its components:
<IMG SRC=”image.gif” ALT=”some text” WIDTH=32 HEIGHT=32>
IMG = Image; SRC = Source; “image.gif” = the name of the file which can be a .gif .jpg or .png; ALT = Alternate Text which will shows the label you gave the image and displays when you hover over the image with your mouse, or the label displays if the image cannot load (if the email client blocks the image for example); “some text” is actual aforementioned label that will display; WIDTH = sets the width of image in pixel; HEIGHT is the width of the image in pixels. You might need a graphics program to determine the height and width of the image you’re loading, otherwise it might get distorted.
If we take that basic HTML image tag syntax, and use it for an image hosted by Salesforce.com, it will look like this:
<img src=”https://na2.salesforce.com/servlet/servlet.ImageServer?id=015D0000000Dpwc&oid=00DD0000000FHaG&lastMod=1270576568000″ alt=”Company Logo” height=”64″ width=”64″/>
You’ll see that the syntax is similar but immediately after the image source tag you see a URL. Let’s take a moment and break it down.
“NA2” is the Salesforce.com server, or in this instance, North America 2
“id=00DD0000000FHaG” is the Salesforce.com database record ID for a document in the Document Tab
“oid=00DD0000000FHaG” – this is your Organizational ID (or, OID) in your instance of Salesforce. If you have setup Web-to-lead, you’ve seen this OID used before. You can also find your Organization ID by going to Setup > Administration Setup > Company Profile > Company Information. It will display as a field on your Company’s profile.
With the combination of the three elements above, Salesforce is giving an address from where to pull the image: this Salesforce server > this instance of Salesforce > and this record (or document). So how do we get that image address information easily out of Salesforce?
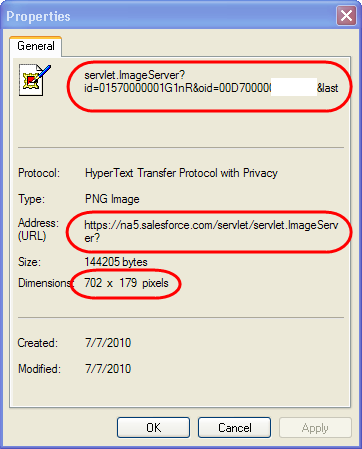
If you are looking at the Document record that contains your graphic, it should display at the bottom of the record. Right click the image and select “Properties”
You should see a pop-up window similar to this:
This properties window has all the information you need to create the image tag, but will take a little editing. First highlight the “Address (URL)” and paste it in a word document or notepad for editing:
https://na5.salesforce.com/servlet/servlet.ImageServer?
Next highlight and copy the name of the file from the top of the window:
servlet.ImageServer?id=01570000001G1nR&oid=00D70000000XXXX&lastMod
Lastly note the image dimensions. In this case it is 702 X 179 pixels.
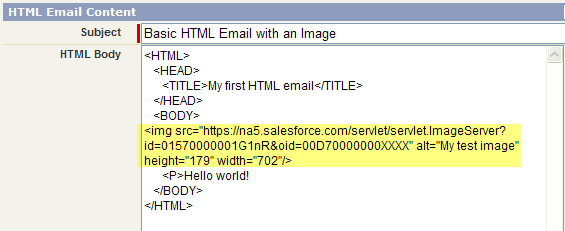
Now let’s cobble together our HTML image source tag using the information above. I’ll start with the generic Salesforce.com example from earlier and drop in the pieces particular to my Salesforce.com instance (highlighted below).
<img src=”https://na5.salesforce.com/servlet/servlet.ImageServer?id=01570000001G1nR&oid=00D70000000XXXX” alt=”My test image” height=”179” width=”702“/>
Now I can drop that into my HTML tag into my email
Click the “Next” button on our wizard. The last step, Step 4, gives you the opportunity to display a text only message if the email clients block your graphics. You can click the button “Copy text from HTML version,” or type in anything you’d like. Then click the “Save” button.
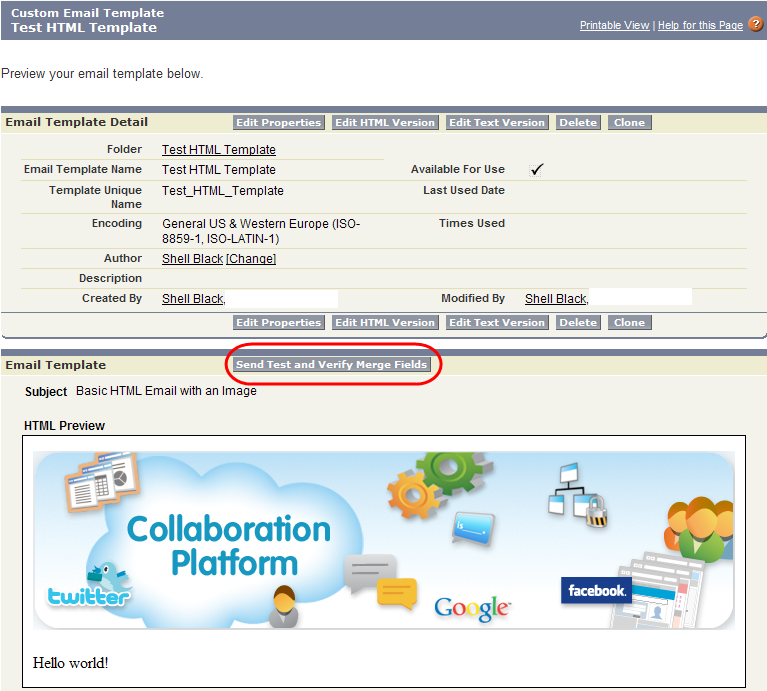
If you did everything correctly, your image should display when viewing the email template:
Now we can test our email directly from the template (which is a recent feature by the way!), by simply clicking the button labeled “Send Test and Verify Mail Merge Fields.” From the pop-up window enter an email address at the bottom or select an existing Contact and click the “OK” button.
Troubleshooting:
Problem: The image doesn’t load in the template preview and looks like this:
Solution 1: Go back and make sure the document has the checkbox “Externally Available Image” checked.
Solution 2: Your HTML tag has an issue – probably in the URL section. If you are currently logged into Salesforce.com, try copying and pasting the URL string out of your HTML image tag into a browser window. Start your copy selection with: “https://” and ending your selection before the end quotes after the URL, but before the “alt=” section of the html tag. What you paste in your browser should look something like this: https://na5.salesforce.com/servlet/servlet.ImageServer?id=01570000001G1nR&oid=00D70000000XXXX
If you’re lucky, Salesforce will give you a clue on what’s wrong with the URL string:
Problem: My image displays but is distorted
Solution: You have the incorrect values for your height and width in your image tag
